
Exercise 1 | Value
Objectives:
Objectives:
Develop shading skills to create value.
Development:
Work on the following exercises until they are correct; complete one at a time, checking with instructor during work sessions for suggestions and improvement.
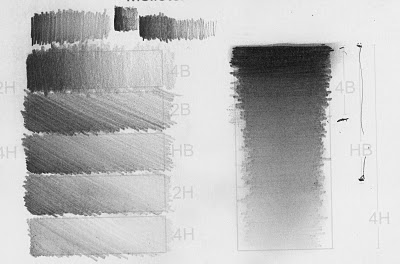
1. Shading Techniques*
By using various pencil strokes and varying the pressure and grade (hard to soft) of the pencil lead, you can create a variety of effects in your drawings.
One of the most important aspects is creating smooth, gradient shading. Here are a few exercises and techniques that can help:
Part 1 Shading - left half of image 1)
Use a 4B, 2B, HB, 2H and 4H and shade from dark to light - keep your shading as consistent and even to create a smooth gradient or transition.
Part 2 (Shading - right half of image 1)
Start with a 4B and shade one third of the way down, then use HB and shade two-thirds of the way down (shading over the 4B).
Then finally shade with 4H over both the 4B, HB and the rest of the section.
2. Graduated Tone*
The pencil shading exercise explored below is called 'graduated tone'.
It is a drawing technique which can be used to create a strong sense of space and form.
It is a very useful skill to develop for both pencil and color pencil drawings.
Use this Pencil Shading Exercise Template Sheet
Part 3: Graduate Tone 1
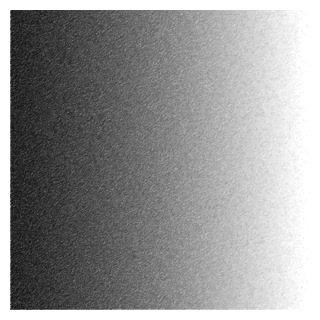
Use a darker grade (B or 2B) of pencil for your shading.
Lighter grades (H, 2H etc.) will not give enough depth to your darkest tones.
. Just start by shading the area you wish to be dark and slowly build up the tone
. As you work towards the light, gradually ease the pressure on your pencil until you can no longer see the mark it makes.
. You then patiently repeat this process several times, building up a depth to the shading, adjusting any irregular areas and trying to keep the tonal changes as smooth as possible until you achieve the variation and intensity of tone that you desire.
Part 4: Graduate Tone 2
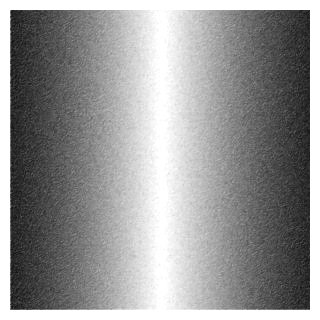
In this exercise the graduated tone starts at either side of the drawing and meets in the middle of the page.
Part 5: Graduate Tone 3

Here the direction of the tone moves from left to right to create a subtle graduated effect.
Part 6: Graduate Tone 4
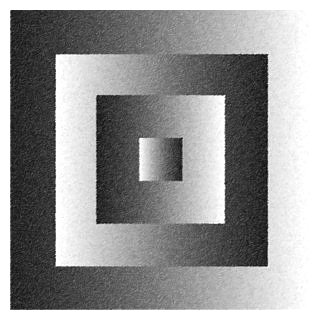
n this exercise the direction of the graduated tones switch to create a counterchange between alternate squares.
Part 7: Graduate Tone 5

Here the direction of the tone moves from 'left to right' in the background but switches to 'right to left' in the circles.
Part 8: Graduate Tone 6
In this exercise the direction of the graduated tones switch to create a counterchange between alternate circles.
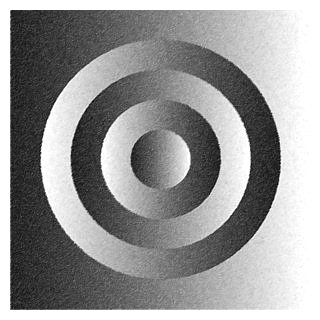
Part 9: Graduate Tone 7
In this exercise the graduated tone moves from 'left to right' in the background but changes its direction in the circle to create a spherical form.
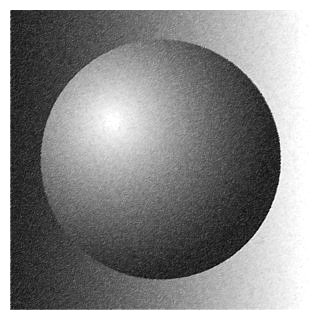
Part 10: Graduate Tone 8

In this final exercise the graduated tone in the background moves from 'left to right' at a 45° angle but changes its direction in the circles to create two 3-dimensional spheres.
Credits:
*1. Shading Techniques: Parts 1 & 2 of this exercise were taken from Diane Wright's site.
*2. Graduated Tones: Parts 3 to 10 of exercise were taken from ArtyFactory site.